Understanding cRABS in Pharmaceutical Manufacturing
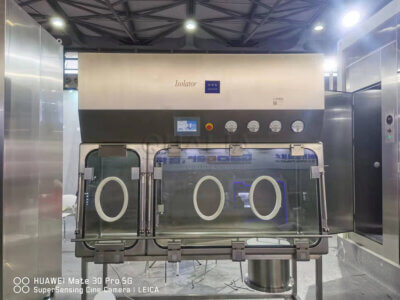
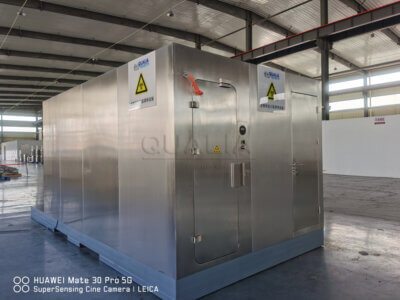
The pharmaceutical industry’s relentless pursuit of contaminant-free manufacturing environments has driven significant innovations in cleanroom technology. Among these advancements, closed Restricted Access Barrier Systems (cRABS) represent a critical evolution that bridges the gap between traditional RABS and full isolator systems. When I first encountered a cRABS installation at a mid-sized vaccine production facility, I was struck by how it fundamentally transformed their manufacturing capabilities while requiring substantially less modification to existing processes than a full isolator conversion would have demanded.
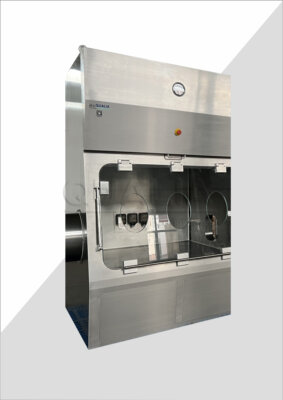
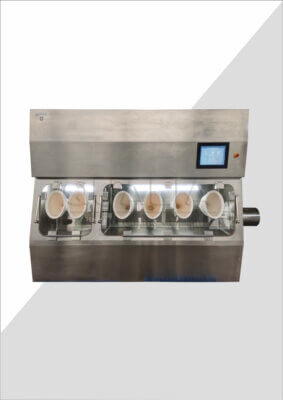
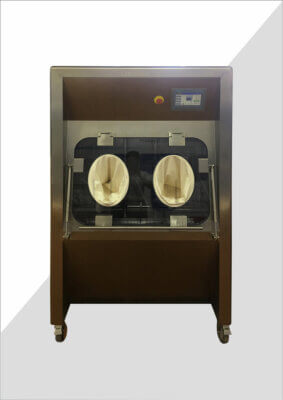
cRABS systems provide a physical barrier between operators and the aseptic processing area, creating a controlled environment that dramatically reduces contamination risks. Unlike traditional open RABS, a properly installed cRABS operates as a closed system during production, maintaining integrity through integrated transfer systems that eliminate the need to break barrier integrity during routine operations.
The distinction between various containment systems isn’t always immediately clear to those new to pharmaceutical manufacturing. Let me break it down:
| System Type | Barrier Features | Operator Access | Air Classification | Typical Application |
|---|---|---|---|---|
| Traditional RABS | Rigid barriers with glove ports | Direct with door opening during production possible | ISO 5 with ISO 7 background | Filling lines with frequent interventions |
| cRABS | Rigid barriers with no door opening during operations | Restricted to glove ports during production | ISO 5 with ISO 7 background | Aseptic filling with moderate intervention needs |
| Isolators | Fully sealed environment with decontamination capability | Only through glove ports/transfer systems | ISO 5 with unclassified background possible | High potency products, cell therapy manufacturing |
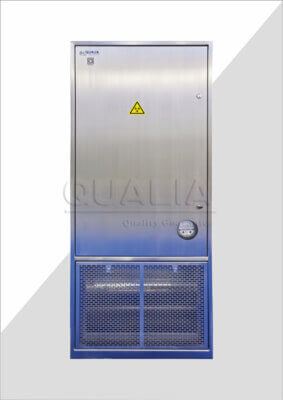
The QUALIA ISOseries cRABS systems have been designed specifically to address the growing regulatory expectations that favor closed systems over traditional open RABS. According to feedback from a senior FDA inspector I spoke with at a recent industry conference, regulatory bodies increasingly expect manufacturers to implement the highest feasible level of contamination control—making cRABS an attractive option for companies not ready to commit to full isolator technology.
What distinguishes a successful cRABS installation from a problematic one often comes down to thorough planning and understanding the specific requirements before the first component arrives on site. Let’s explore the comprehensive process of installing these sophisticated systems.
Pre-Installation Planning and Requirements
Before any physical cRABS installation begins, thorough planning is essential. I’ve witnessed several installation projects go sideways because this critical phase was rushed. One pharmaceutical client in particular had to delay production start by nearly three months because they failed to adequately assess their facility’s structural capacity to support ceiling-hung components.
A proper facility assessment requires a multidisciplinary approach. Your team should include engineering, quality assurance, manufacturing, and validation professionals. The assessment should evaluate:
- Structural integrity of floors/ceilings for support requirements
- Available utilities (electrical capacity, clean compressed air, purified water)
- HVAC system capacity and potential modifications needed
- Material and personnel flow patterns
- Existing cleanroom classification capabilities
During the planning phase, creating detailed specifications is essential. The closed Restricted Access Barrier System (cRABS) requires specific utility connections and environmental parameters that must be established before installation begins. These typically include:
- 480V 3-phase electrical supply with appropriate amperage
- Clean compressed air at 80-100 psi (oil-free, moisture-free)
- Chilled water connections if active cooling is required
- Network infrastructure for control systems
- Sufficient ceiling height for HEPA filter housing
Dr. Sarah Martinez, a pharmaceutical facility design specialist I consulted, emphasizes that “the planning phase typically requires 2-3 times longer than the actual physical installation. Rushing through planning inevitably leads to costly rework and validation delays.”
One particularly valuable planning tool is a detailed timeline with resource allocation. Here’s a representative example based on industry averages:
| Phase | Duration | Key Resources Required | Critical Dependencies |
|---|---|---|---|
| Initial Design | 6-8 weeks | Process engineers, QA representatives | Finalized product/process requirements |
| Detailed Engineering | 8-12 weeks | Mechanical/electrical engineers, automation specialists | Approved concept design |
| Site Preparation | 4-6 weeks | Construction contractors, facility engineers | Approved engineering packages |
| Equipment Delivery | 12-16 weeks | Logistics, receiving team | Completed factory acceptance testing |
| Installation | 3-5 weeks | Installation specialists, facility maintenance | Prepared site with utilities |
| Testing/Qualification | 8-12 weeks | Validation engineers, quality team | Completed installation |
Budget considerations are equally important. While the initial investment for a pharmaceutical-grade cRABS installation is substantial, the long-term benefits often justify the expense. The total cost typically includes:
- Base equipment purchase (the barrier system itself)
- Engineering and design services
- Facility modifications
- Installation labor
- Testing and qualification
- Training
- Documentation development
With planning complete, we can move into the step-by-step installation process.
Step 1: Site Evaluation and Design Considerations
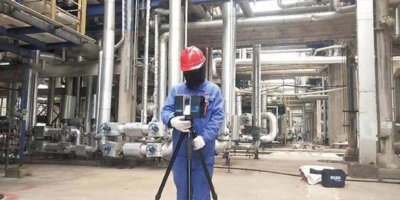
The foundation of a successful cRABS installation begins with thorough site evaluation and design verification. I’ve consulted on projects where inadequate attention to this step led to significant rework during later phases. The site evaluation process is both technical and practical, requiring careful consideration of workflow alongside engineering requirements.
Cleanroom classification is a fundamental consideration. The cRABS system is typically installed within an ISO 7 or ISO 8 background environment, while maintaining an ISO 5 environment within the barrier system itself. This creates specific requirements for the surrounding area, including:
- Appropriate air change rates (typically 20+ air changes per hour)
- HEPA filtered supply air
- Proper pressure differentials between adjacent spaces
- Appropriate room finish materials (seamless, cleanable surfaces)
- Control of temperature and humidity
The space allocation must account not just for the footprint of the cRABS unit itself, but also for operational clearances. In a recent project I observed, the engineering team initially failed to account for maintenance access space, creating significant challenges for filter changes and mechanical servicing.
Workflow analysis is equally critical. Map the flow of:
- Materials entering the cRABS
- Product moving through processing steps
- Waste removal
- Operator movements during normal operations
- Maintenance access requirements
Utility connections require detailed planning. The high-performance cRABS technology depends on reliable utility support. I’ve found that documenting these requirements in a comprehensive utility matrix helps ensure nothing is overlooked. This should include:
- Electrical requirements (voltage, phase, amperage)
- Network connections for control systems
- Compressed air specifications
- Water connections if needed
- Drain requirements
- HVAC interfaces
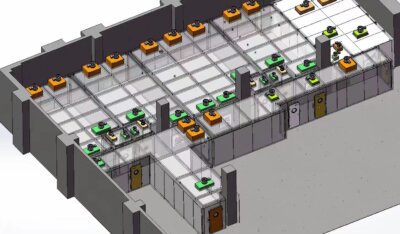
The design verification process should include computer modeling of airflow patterns, which allows for identification of potential dead zones or turbulence that could compromise aseptic conditions. 3D modeling of the entire installation also helps identify potential clearance issues or interferences before equipment arrives on site.
This evaluation phase typically requires 4-6 weeks and should result in a comprehensive design package that guides all subsequent installation activities.
Step 2: Component Preparation and Initial Assembly
Once the design is finalized and the site properly evaluated, the next critical phase involves preparing all components and beginning initial assembly work. In my experience overseeing multiple pharmaceutical facility projects, this preparation phase often determines whether the subsequent installation will proceed smoothly or face continuous challenges.
Equipment verification is the essential first step. When the cRABS components arrive at your facility, conduct a thorough inventory check against the bill of materials. I’ve seen installations delayed by weeks because of missing components that weren’t identified until assembly began. Create a detailed checklist that includes:
- All structural components (frames, panels, doors)
- Glove ports and gloves of appropriate sizes
- HEPA filter housings and filters
- Control system components
- Fasteners and sealing materials
- Documentation and certificates
Inspect all components for damage that may have occurred during shipping. Pay particular attention to:
- Glass or polycarbonate panels for cracks or scratches
- Sealing surfaces for damage
- Anodized aluminum frames for dents or deformation
- Electronics for any signs of impact
Before full assembly begins, the core frame structure is typically prepared. This often happens in a staging area adjacent to the final installation location. Staging areas should be clean and controlled, though not necessarily at the same classification level as the final installation site.
During a recent cRABS installation I consulted on, the team created a dedicated staging area with positive pressure and HEPA-filtered air to minimize contamination of components before they entered the cleanroom. This extra precaution significantly reduced cleaning time during the final installation.
Documentation requirements during this phase are substantial. Maintain detailed records of:
- Component receipt and inspection results
- Any deviations from specifications
- Assembly procedures followed
- Quality control checks performed
- Changes to design or components
Utility integration planning at this stage involves identifying all connection points and ensuring that the appropriate fittings and interfaces are available. Mark connection points clearly to avoid confusion during final installation.
As an industry best practice, many manufacturers perform a partial mock assembly of critical interfaces to verify fit and function before moving components into the cleanroom environment. This approach identified several potential issues during a project I supervised last year, allowing us to resolve them before the more complex cleanroom installation began.
Step 3: Main Structure Installation
The installation of the main cRABS structure represents the most visible transformation in the process and requires precision engineering and execution. Having observed numerous installations across different facilities, I’ve noticed that the success of this phase heavily depends on the skill of the installation team and adherence to manufacturer specifications.
Frame assembly typically begins with the base frame components being positioned according to the approved layout drawings. Using laser leveling equipment is essential—I’ve seen installations where small inaccuracies in the base frame compounded into significant issues with panel fit and door operation later.
The frame must be properly secured to the floor using appropriate anchoring methods. Depending on the specific cRABS design and facility requirements, this might involve:
- Chemical anchors embedded into concrete
- Welded connections to embedded floor plates
- Heavy-duty adjustable leveling feet with locking mechanisms
Vertical frame members are then erected and temporarily braced while additional cross-members and supports are installed. Critical to this process is ongoing verification of:
- Squareness of all frame sections
- Vertical alignment of support posts
- Proper spacing for panel installation
- Level horizontal members
Panel installation follows frame assembly. These panels—typically constructed of tempered glass, polycarbonate, or stainless steel—create the actual barrier between the controlled environment and the surrounding area. The installation sequence matters significantly; I recommend creating a numbered sequence diagram before beginning.
Sealing and gasket installation is perhaps the most critical aspect of this phase. The integrity of these seals determines the system’s ability to maintain proper pressurization and prevent contamination. During a pharmaceutical installation I supervised in 2021, we discovered that ambient temperature variations affected gasket pliability. We adjusted our installation schedule to perform gasket installation during the morning hours when material properties were most favorable.
Quality control checkpoints during main structure installation should include:
- Dimensional verification of the completed frame
- Torque checks on all critical fasteners
- Visual inspection of all sealing surfaces
- Gap measurements between panels and frames
- Verification of door alignment before final securing
Documentation during this phase should capture:
- Any deviations from installation drawings
- Torque values applied to critical connections
- Lot numbers of gaskets and sealing materials used
- Verification of completed quality checks
- Photographs of critical junctions before they become inaccessible
This phase typically requires 7-10 days for a moderate-sized system, though complex installations may take longer. The completion of the main structure creates the foundation for all subsequent systems integration.
Step 4: Door Systems and Transfer Mechanisms
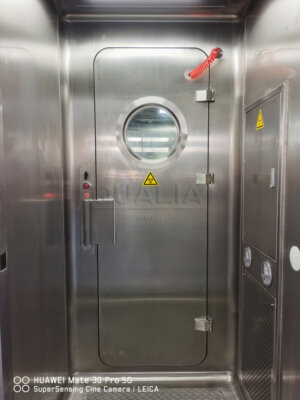
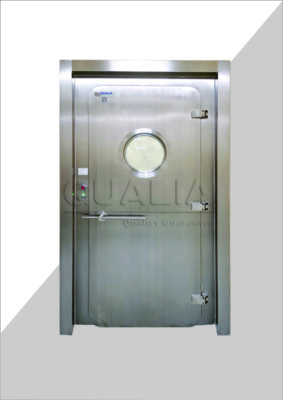
The door systems and material transfer mechanisms represent some of the most critical components in a cRABS installation. They must maintain barrier integrity while allowing necessary access for materials and interventions. Having worked with facilities using various configurations, I’ve found this aspect frequently presents the greatest technical challenges during installation.
Door systems for cRABS installations typically include several distinct types:
- Main access doors for equipment loading/maintenance
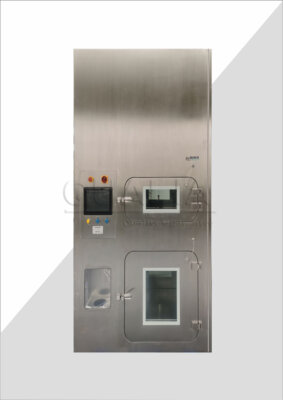
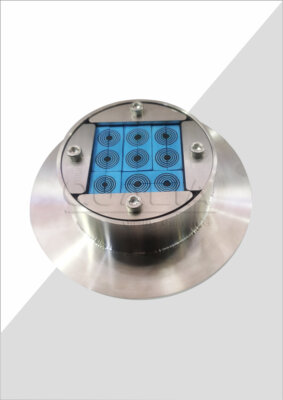
- Rapid transfer ports (RTPs) for materials
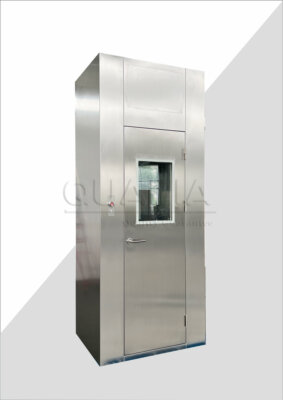
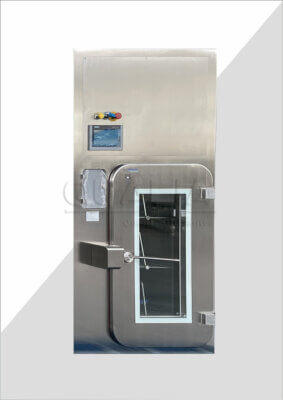
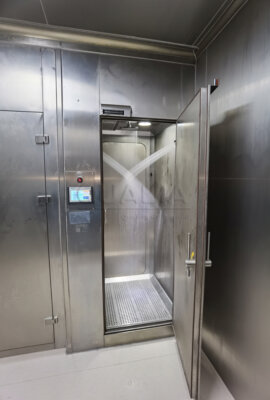
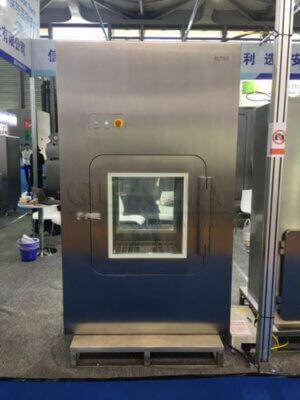
- Pass-through chambers with interlocking mechanisms
- Mini-doors for emergency access to specific areas
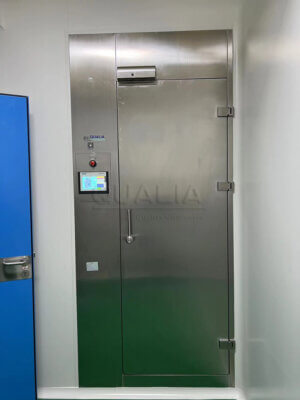
Each door type requires precise installation to ensure proper sealing and operation. The main access doors are particularly critical, as they must provide a robust seal during operation while allowing complete access during maintenance modes. During installation, door alignment needs careful adjustment—I typically recommend dedicated time for this rather than rushing through the process.
The transfer port installation requires particular attention to detail. These systems—whether active or passive—create controlled pathways for materials to enter the cRABS environment without compromising cleanliness. Installation considerations include:
- Structural reinforcement around port openings
- Perfectly circular cutting of openings in barrier panels
- Precise alignment of inner and outer port components
- Careful testing of locking mechanisms
- Proper adjustment of sealing force
One challenging installation I consulted on involved retrofitting a high-performance cRABS system into an existing filling line. The team had to create custom transfer port adaptors to interface with legacy equipment. This required careful field measurement and customized fabrication of transition components.
Airlock or pass-through systems present their own installation challenges. The interlocking mechanisms that prevent simultaneous opening of doors must be precisely adjusted. Testing should include:
- Verification of mechanical interlocks
- Testing of electronic interlocking systems
- Confirmation that safety overrides function as designed
- Air leakage testing at operating pressure differentials
Door integrity testing is an essential quality checkpoint. This typically involves:
- Visual inspection of gasket compression when doors are closed
- Smoke testing to visualize air leakage patterns
- Pressure decay testing of sealed volumes
- Particle counting inside and outside the barrier during door operation
Most manufacturers include specific recommendations for door adjustment in their installation documentation. In my experience, allocating sufficient time for these adjustments prevents countless headaches during operational qualification.
During a recent pharmaceutical installation, we discovered that the building’s HVAC system created variable pressure conditions that affected door operation. The solution involved installing direct pressure monitoring on both sides of critical doors, with data reviewed during different HVAC operating conditions before finalizing door adjustments.
Step 5: HVAC and Filtration System Integration
The HVAC and filtration systems are the lungs of any cRABS installation, establishing and maintaining the controlled environment necessary for aseptic processing. In my years overseeing pharmaceutical facility projects, I’ve seen that proper integration of these systems often determines whether a cRABS will meet its performance specifications.
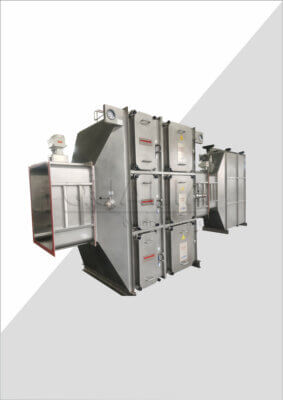
HEPA filtration installation must follow a carefully planned sequence. The filter housing units are typically mounted to the ceiling of the cRABS enclosure, requiring:
- Structural support verification
- Precise positioning according to the airflow design
- Careful handling to prevent damage to filter media or frames
- Proper gasketing to prevent bypass leakage
During a complex cRABS system integration I managed last year, we discovered that the original filter housing positions created uneven airflow patterns. Using computational fluid dynamics (CFD) modeling, we were able to optimize filter placement before final installation, saving significant rework later.
Air handling unit connections require coordination between the cRABS installer and the facility’s HVAC contractor. Critical connections include:
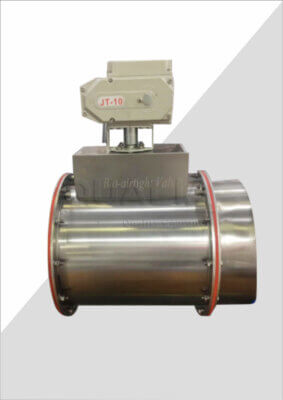
- Supply air ductwork to filter housings
- Return/exhaust air pathways
- Damper control interfaces
- Temperature and humidity control integration
The establishment of proper pressure cascades is fundamental to cRABS operation. This typically involves:
- Setting up pressure zones with progressively higher positive pressure moving inward
- Installing pressure monitoring sensors at key locations
- Calibrating pressure differential setpoints
- Testing pressure relationships under various operating conditions
During commissioning, we typically establish these pressure differentials:
- +0.05″ WC (12.5 Pa) from surroundings to the cleanroom
- +0.03-0.05″ WC (7.5-12.5 Pa) from cleanroom to airlocks
- +0.03-0.05″ WC (7.5-12.5 Pa) from airlocks to cRABS interior
This pressure cascade creates airflow patterns that always move from cleaner to less clean areas, protecting product from contamination.
Monitoring system integration connects the cRABS environment to the facility’s environmental monitoring system. Components typically include:
- Particle counters at critical locations
- Temperature and humidity sensors
- Pressure differential transmitters
- Air velocity sensors in critical zones
These monitoring systems must be properly installed, wired, and calibrated. In my experience, involving the validation team during this phase helps ensure that sensor locations and specifications will meet requirements for ongoing monitoring and data collection.
Integration challenges often emerge during this phase. On a recent project, we discovered that the building automation system used different communication protocols than the cRABS control system. This required installing protocol converters to enable proper data exchange—a simple solution, but one that caused delays because it wasn’t identified during planning.
Step 6: Control Systems and Monitoring Setup
The control and monitoring systems form the nervous system of a cRABS installation, providing both operational control and the critical data needed for compliance. I’ve found that this phase often receives less attention than the physical construction, yet it’s equally vital to successful implementation.
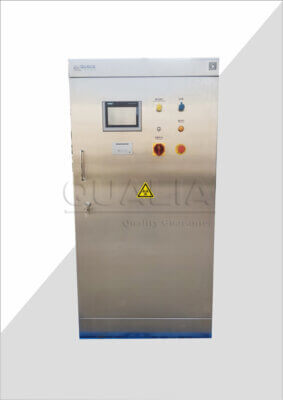
Automation system installation involves both hardware and software components. The hardware typically includes:
- Programmable Logic Controllers (PLCs)
- Input/Output (I/O) modules
- Network switches and communication hardware
- Uninterruptible power supplies for critical control elements
When installing the high-performance control systems for cRABS installations, proper grounding and protection from electrical noise is essential. During a recent pharmaceutical installation, we discovered interference between the facility’s high-power equipment and sensitive control signals. This required additional shielding and signal conditioning that hadn’t been anticipated.
Sensor placement and calibration requires careful planning and execution. Critical sensors typically include:
- Differential pressure transmitters between zones
- Temperature and humidity sensors
- Airflow velocity sensors
- Particle counters at strategic locations
- Door position switches
- Filter status monitors (typically differential pressure)
During sensor installation, consideration must be given to:
- Accessibility for routine calibration
- Proper mounting to avoid vibration effects
- Protection from process activities that might damage them
- Representative sampling of the environment they monitor
Alarm systems configuration must balance sensitivity with practicality. Setting alarm limits requires understanding of:
- Normal process variation
- Critical operating parameters
- Response time requirements
- Regulatory expectations
I typically recommend a tiered alarm approach with:
- Advisory alerts for approaching limits
- Warning alarms for exceeding operation targets
- Critical alarms for conditions that might compromise product
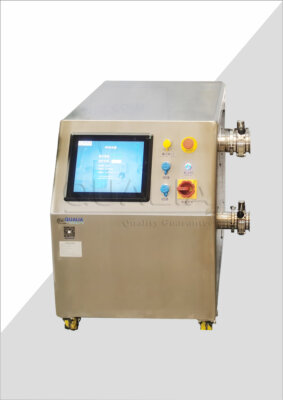
Human-Machine Interface (HMI) setup is the visible face of the control system. Modern cRABS installations typically feature touchscreen interfaces that provide:
- System status overview
- Detailed parameter displays
- Alarm management
- Trend data visualization
- User access control
The HMI design should prioritize clarity and usability for operators while providing sufficient detail for technical troubleshooting. One pharmaceutical client I worked with involved their operators in HMI design workshops, resulting in significant improvements to the interface based on practical operational experience.
Networking and data management must also be considered during this phase. Modern cRABS systems typically connect to:
- Facility monitoring systems
- Electronic batch record systems
- Maintenance management systems
- Data historians for long-term storage
During commissioning, all control strategies should be thoroughly tested, including:
- Normal operation sequences
- Response to process deviations
- Alarm generation and notification
- Data recording and retrieval
- User security functions
This testing often reveals configuration issues that must be resolved before the final validation phase.
Step 7: Testing, Qualification and Validation
The testing, qualification, and validation phase transforms a mechanical installation into a documented, compliant pharmaceutical manufacturing system. Having led numerous validation projects, I can attest that the rigor applied during this phase directly affects regulatory acceptance and operational reliability.
Factory Acceptance Testing (FAT) actually occurs before the equipment arrives at your site. During FAT, the cRABS manufacturer demonstrates that the system meets design specifications under controlled conditions. Key elements typically include:
- Structural integrity verification
- Control system functionality
- Air handling performance
- Door and transfer system operation
- Alarm system testing
While most manufacturers offer standard FAT protocols, I recommend developing custom protocols that address specific concerns for your application. During FAT for a specialized cRABS system I was involved with, we included additional challenges to verify operation under worst-case scenarios that were specific to our manufacturing process.
Site Acceptance Testing (SAT) occurs after installation is complete. This testing verifies that the system performs as expected in its actual operating environment. SAT typically includes:
- Verification of proper installation
- Basic functionality testing
- Initial performance verification
- Identification of any shipping damage or installation issues
Installation Qualification (IQ) documents that the system has been properly installed according to approved specifications. IQ activities typically include:
- Verification of component model numbers and specifications
- Documentation of utility connections
- Confirmation of construction materials
- Verification of drawing accuracy
- Documentation of software versions
- Calibration verification for instruments
Operational Qualification (OQ) demonstrates that the system functions as intended across its operating range. OQ testing typically includes:
- Airflow visualization studies
- HEPA filter integrity testing
- Particle count verification under operating conditions
- Temperature and humidity mapping
- Pressure differential verification under various conditions
- Recovery testing after door openings
- Challenge testing of alarm systems
Performance Qualification (PQ) demonstrates that the system consistently performs as expected under actual production conditions. PQ may include:
- Extended running with process simulations
- Multiple operator shifts
- Various product configurations
- Seasonal variations if applicable
- Integration with actual production activities
Documentation requirements for validation are substantial. A typical validation package includes:
- Validation master plan
- User requirements specification
- Functional specifications
- Design documentation
- Risk assessments
- IQ/OQ/PQ protocols and reports
- Validation summary report
| Test Type | Typical Acceptance Criteria | Testing Method | Frequency |
|---|---|---|---|
| HEPA Filter Integrity | ≤0.01% penetration | DOP/PAO challenge | Installation, biannual |
| Clean zone particle count | ≤3,520 particles ≥0.5μm per m³ (ISO 5) | Electronic particle counter | Installation, routine monitoring |
| Recovery after intervention | Return to ISO 5 within 15 min | Particle counting time series | Installation, periodic verification |
| Pressure differential | ≥7.5 Pa between adjacent zones | Calibrated pressure transmitter | Installation, continuous monitoring |
| Air exchange rate | ≥20 air changes per hour | Air velocity × cross-section | Installation, annual verification |
The validation process typically takes 2-3 months from IQ through final PQ report approval. This timeline can extend if issues are identified requiring remediation.
Dr. James Chen, a validation specialist I frequently collaborate with, emphasizes that “validation is not just documentation—it’s a process of challenging the system to prove it can reliably deliver what it promises. The most valuable validation uncovers and addresses weaknesses before they affect production.”
Post-Installation Considerations
The completion of installation and validation marks the beginning—not the end—of your cRABS journey. Based on my experience with numerous pharmaceutical facilities, the post-installation phase determines whether your investment will deliver sustained value or become a maintenance burden.
Operator training programs are essential for successful implementation. These should go beyond basic operation to include:
- Understanding of cleanroom behavior principles
- System design rationale and limitations
- Response to various alarm conditions
- Basic troubleshooting techniques
- Documentation requirements
- Cleaning and sanitization procedures
During the startup of a new pharmaceutical cRABS installation I consulted on last year, we implemented a tiered training approach with basic, intermediate, and advanced certifications. This created a career development path while ensuring adequate technical knowledge throughout the organization.
Maintenance schedule development requires balancing operational needs with system reliability. A typical maintenance program includes:
- Daily visual inspections
- Weekly functional checks
- Monthly preventive maintenance
- Quarterly filter differential pressure testing
- Semi-annual HEPA filter integrity testing
- Annual comprehensive system review
Establishing clear maintenance responsibilities between facility engineering, production, and outside contractors is crucial. One effective approach I’ve seen implemented divides responsibilities based on:
- Routine vs. specialized maintenance
- Production impact (requires shutdown vs. can be performed during operation)
- Technical complexity
- Regulatory implications
Performance monitoring strategies should extend beyond compliance requirements to include operational efficiency metrics such as:
- Frequency and duration of unplanned downtime
- Mean time between failures for critical components
- Energy consumption relative to production volume
- Intervention frequency during production
- Contamination control effectiveness
Continuous improvement recommendations should be systematically collected and evaluated. Sources might include:
- Operator feedback
- Maintenance trends
- Quality event investigations
- Production efficiency analysis
- Regulatory updates
- Technology advancements
One pharmaceutical manufacturer I worked with implemented a quarterly cRABS performance review with representatives from operations, quality, maintenance, and engineering. This cross-functional approach identified several optimization opportunities that improved both compliance and efficiency.
The regulatory landscape for aseptic manufacturing continues to evolve, with increasing emphasis on closed processing and contamination control. Keeping your cRABS installation current with these expectations requires ongoing vigilance and periodic reassessment of your approach against industry best practices.
Finally, developing a long-term capital plan for system updates and eventual replacement ensures that budgetary resources will be available when needed. Most cRABS installations have an effective life of 10-15 years before major updates or replacement should be considered, though this varies significantly based on use patterns and maintenance quality.
By approaching your cRABS installation as an ongoing program rather than a one-time project, you can maximize the return on your investment while maintaining the high level of performance that pharmaceutical manufacturing demands.
Frequently Asked Questions of cRABS installation
Q: What is cRABS, and why is its installation important?
A: cRABS is a command-line toolkit used to create reference databases for amplicon sequencing, which is crucial for analyzing biological samples in pharmaceutical applications. Its installation is essential for researchers requiring efficient data processing tools for genomic analysis.
Q: What are the methods available for cRABS installation?
A: There are three primary methods for installing cRABS: manual installation by cloning the repository and installing dependencies separately, using Docker for automated dependency management, and installation via conda for a more streamlined process.
Q: What dependencies are required for a manual cRABS installation?
A: For manual installation, cRABS requires several Python modules and external software, including requests, rich, rich-click, matplotlib, and numpy, along with external tools. Ensure all dependencies are globally accessible.
Q: How do I check if cRABS is successfully installed?
A: To verify a successful installation of cRABS, use the command crabs -h. This will display help information including available functions and parameters.
Q: Can I use cRABS in different operating systems like Windows?
A: While cRABS has been tested on Mac and Linux systems, its use on Windows is primarily through special environments like the Windows Subsystem for Linux (WSL), where it can be used with some adjustments.
Q: What are some common challenges during cRABS installation?
A: Common challenges include ensuring all dependencies are correctly installed, managing environment variables, and avoiding version conflicts among Python modules. Carefully follow installation instructions to minimize these issues.
External Resources
- CRABS Installation – Provides detailed instructions for installing CRABS, a software for creating reference databases for metabarcoding sequencing data, including manual, Docker, and conda installations.
- CRABS Installation via GitHub – Offers step-by-step guides on how to manually set up and configure CRABS with Python dependencies.
- Conda CRABS Installation – Explains how to install CRABS using conda, ensuring seamless dependency management.
- Installing CRABS with Dependencies – Lists necessary dependencies like Python modules and external software required for CRABS to run.
- CRABS Documentation – Includes verification steps to ensure that CRABS is installed correctly and usable.
- Bioconda CRABS Package – Allows for the installation of CRABS via Bioconda, simplifying the process of managing biological software dependencies.
Related Contents:
- cRABS Material Transfer: Ensuring Sterile Product Flow
- cRABS in Sterile Drugs: Enhancing Aseptic Production
- cRABS Air Systems: Ensuring ISO 5 Environment
- cRABS Installation: Expert Services for Pharma
- Validating Your cRABS: A Step-by-Step Checklist
- The Ultimate Guide to cRABS: Enhancing Sterile Manufacturing
- Validating cRABS: Ensuring Compliance in Pharma
- Next-Gen cRABS Materials: Advancing Sterile Barriers
- Validating cRABS: Meeting Pharma Regulatory Standards


