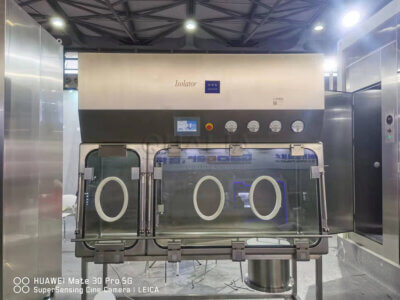
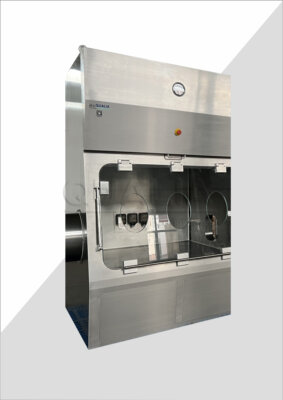
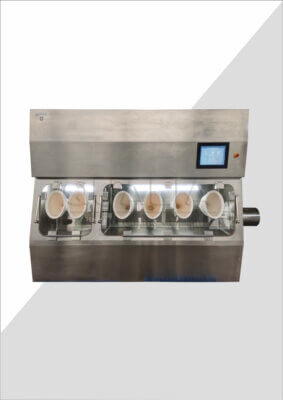
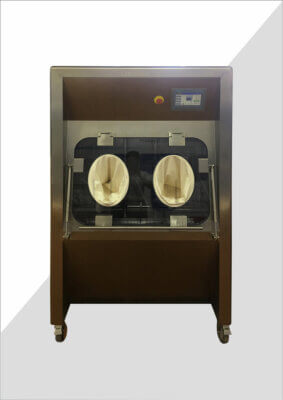
Biosafety cabinets are critical components of laboratory safety, providing a controlled environment to protect both personnel and materials from potentially hazardous biological agents. Proper cleaning and maintenance of these cabinets are essential to ensure their continued effectiveness and longevity. This comprehensive guide will walk you through the step-by-step process of cleaning a biosafety cabinet, covering everything from daily procedures to annual maintenance tasks.
Maintaining a clean biosafety cabinet is not just about keeping it tidy; it's about preserving the integrity of your experiments, protecting yourself and your colleagues, and complying with safety regulations. Whether you're a seasoned lab technician or a new researcher, understanding the intricacies of QUALIA biosafety cabinet cleaning procedures is crucial for creating a safe and efficient work environment.
As we delve into the details of biosafety cabinet cleaning, we'll explore the essential steps, recommended cleaning agents, and best practices that will help you maintain your cabinet in optimal condition. From surface decontamination to HEPA filter checks, we'll cover all aspects of biosafety cabinet maintenance to ensure your laboratory operations remain safe and compliant.
Proper cleaning and maintenance of biosafety cabinets are fundamental to laboratory safety and research integrity. Regular cleaning not only extends the life of the equipment but also ensures the protection of personnel and experimental materials from biological hazards.
What are the key components of a biosafety cabinet that require regular cleaning?
The first step in effective biosafety cabinet cleaning is understanding its key components. A typical biosafety cabinet consists of several critical parts, each requiring specific cleaning attention.
The main components include the work surface, interior walls, front and back grilles, and the viewing window. These areas are in direct contact with the workspace and are most likely to accumulate contaminants during use.
Beyond the visible surfaces, there are also crucial internal components such as the HEPA filters and the plenum (the space beneath the work surface) that require periodic inspection and cleaning.
Regular cleaning of all biosafety cabinet components is essential for maintaining the cabinet's integrity and ensuring a sterile work environment. Neglecting any part of the cabinet can compromise its functionality and put lab personnel at risk.
| Component | Cleaning Frequency | Cleaning Method |
|---|---|---|
| Work Surface | Daily | Disinfectant wipe-down |
| Interior Walls | Weekly | Thorough disinfection |
| Grilles | Monthly | Vacuum and disinfect |
| Viewing Window | Weekly | Clean with appropriate solution |
| HEPA Filters | Annually | Professional inspection |
When approaching the cleaning process, it's important to consider each component's role in maintaining the cabinet's protective barrier. The work surface, for instance, is the primary contact area for experiments and requires daily attention. The interior walls and grilles play crucial roles in airflow management and must be kept free of debris and contaminants.
The viewing window, while not directly involved in containment, must be kept clean for clear visibility and safety during operations. HEPA filters, the heart of the cabinet's air purification system, require professional assessment to ensure they continue to trap particles effectively.
Understanding these components and their cleaning requirements sets the foundation for a comprehensive Biosafety cabinet cleaning procedures . By giving each part the attention it needs, you ensure the overall performance and safety of your biosafety cabinet.
How should you prepare for cleaning a biosafety cabinet?
Preparation is key to effective biosafety cabinet cleaning. Before you begin the cleaning process, it's crucial to gather all necessary materials and take appropriate safety precautions.
Start by assembling your cleaning kit. This should include appropriate personal protective equipment (PPE) such as gloves, a lab coat, and safety goggles. You'll also need disinfectants approved for use in your laboratory, lint-free wipes or cloths, and any specialized cleaning tools recommended by the cabinet manufacturer.
Ensure that the biosafety cabinet is empty of all materials and equipment. If the cabinet has been in use, allow sufficient time for any airborne particles to settle before beginning the cleaning process.
Proper preparation is essential for effective and safe biosafety cabinet cleaning. Gathering all necessary materials and taking appropriate safety precautions before starting ensures a smooth and thorough cleaning process.
| Preparation Item | Purpose |
|---|---|
| Gloves | Protect hands from disinfectants and contaminants |
| Lab Coat | Protect clothing and skin from splashes |
| Safety Goggles | Protect eyes from cleaning agents |
| Disinfectants | Eliminate microbial contaminants |
| Lint-free Wipes | Clean surfaces without leaving residue |
| Specialized Tools | Address specific cleaning needs |
Before beginning the cleaning process, it's important to review the manufacturer's guidelines for your specific biosafety cabinet model. Different cabinets may have unique features or materials that require special attention or specific cleaning agents.
Additionally, consider the timing of your cleaning session. Ideally, clean the cabinet at the end of the workday or during a period when it won't be needed for several hours. This allows ample time for thorough cleaning and complete drying of all surfaces.
By taking these preparatory steps, you set the stage for a comprehensive and effective cleaning process. Proper preparation not only ensures the safety of the person cleaning but also contributes to the overall effectiveness of the maintenance procedure.
What is the correct sequence for cleaning a biosafety cabinet?
Following the correct sequence when cleaning a biosafety cabinet is crucial for maintaining its sterility and functionality. The cleaning process should always proceed from the cleanest areas to the most contaminated, and from top to bottom.
Begin by cleaning the interior surfaces of the cabinet, starting with the ceiling and working your way down the back and side walls. Pay special attention to corners and crevices where contaminants might accumulate.
Next, clean the work surface thoroughly, followed by the front and back grilles. The final interior component to clean is usually the drain pan, if your cabinet model includes one.
Adhering to a top-to-bottom, clean-to-dirty sequence ensures that contaminants are not spread during the cleaning process. This methodical approach is essential for maintaining the sterility of the biosafety cabinet.
| Cleaning Step | Area | Key Points |
|---|---|---|
| 1 | Ceiling | Start at the top |
| 2 | Back and Side Walls | Work downwards |
| 3 | Work Surface | Thorough disinfection |
| 4 | Front and Back Grilles | Remove debris |
| 5 | Drain Pan | Clean if present |
After cleaning the interior, move to the exterior surfaces. Clean the view screen, both inside and out, and then wipe down the exterior surfaces of the cabinet. Remember to clean any controls or switches, being careful not to saturate electronic components.
Throughout the cleaning process, use a fresh wipe or cloth for each new area to prevent cross-contamination. Dispose of used cleaning materials properly according to your laboratory's waste management protocols.
By following this sequence, you ensure a thorough and effective cleaning of your biosafety cabinet. This methodical approach not only maintains the cabinet's cleanliness but also contributes to its long-term performance and reliability.
Which cleaning agents are appropriate for biosafety cabinet maintenance?
Selecting the right cleaning agents is crucial for effective biosafety cabinet maintenance. The choice of cleaning agent depends on the types of contaminants you're dealing with and the materials used in your cabinet's construction.
For general cleaning, a 70% isopropyl alcohol solution is often recommended. It's effective against a wide range of microorganisms and evaporates quickly without leaving residue. For more stubborn contaminants or when dealing with specific pathogens, you may need to use stronger disinfectants.
Bleach solutions (typically 1:10 dilution of household bleach) are effective against a broad spectrum of microorganisms but should be used cautiously as they can be corrosive to metal surfaces if not properly rinsed.
The choice of cleaning agent should be based on its effectiveness against relevant pathogens, compatibility with cabinet materials, and safety for laboratory personnel. Always refer to your institution's guidelines and the cabinet manufacturer's recommendations.
| Cleaning Agent | Effectiveness | Precautions |
|---|---|---|
| 70% Isopropyl Alcohol | General disinfection | Flammable, use caution |
| 1:10 Bleach Solution | Broad spectrum | Corrosive, rinse thoroughly |
| Quaternary Ammonium Compounds | Effective disinfectant | May leave residue |
| Hydrogen Peroxide | Strong oxidizer | Can be corrosive |
When using any cleaning agent, it's important to allow sufficient contact time for the disinfectant to be effective. This typically ranges from 1 to 10 minutes, depending on the product and the level of contamination.
Be cautious about using abrasive cleaners or those containing chlorides, as these can damage the stainless steel surfaces common in many biosafety cabinets. Always test a new cleaning agent on a small, inconspicuous area before using it throughout the cabinet.
Remember that the effectiveness of your cleaning routine depends not just on the choice of cleaning agent, but also on proper application and adherence to contact times. By selecting appropriate cleaning agents and using them correctly, you ensure the thorough decontamination of your biosafety cabinet while preserving its integrity.
How often should different parts of a biosafety cabinet be cleaned?
Establishing a regular cleaning schedule for your biosafety cabinet is essential for maintaining its effectiveness and longevity. Different parts of the cabinet require cleaning at varying frequencies, depending on their function and exposure to contaminants.
The work surface should be cleaned daily, or after each use if multiple researchers are using the cabinet. This frequent cleaning helps prevent cross-contamination between experiments and maintains a sterile work environment.
Interior walls, the view screen, and grilles should be cleaned weekly. These components, while not in direct contact with experimental materials, can accumulate contaminants over time and affect the cabinet's performance if neglected.
Regular cleaning schedules are crucial for maintaining biosafety cabinet effectiveness. Daily, weekly, and monthly cleaning routines, combined with annual professional maintenance, ensure optimal performance and longevity of the equipment.
| Cabinet Component | Cleaning Frequency | Reason |
|---|---|---|
| Work Surface | Daily | Prevent cross-contamination |
| Interior Walls | Weekly | Maintain sterile environment |
| View Screen | Weekly | Ensure clear visibility |
| Grilles | Monthly | Maintain proper airflow |
| HEPA Filters | Annually | Ensure filtration efficiency |
Monthly cleaning should include a more thorough inspection and cleaning of less accessible parts, such as the area beneath the work surface and the plenum. This helps prevent the buildup of debris that could affect airflow and filtration.
Annual maintenance, typically performed by a certified professional, should include a comprehensive cleaning of all components, including hard-to-reach areas. This is also when HEPA filters are inspected and, if necessary, replaced.
It's important to note that these are general guidelines, and your specific cleaning schedule may vary based on the intensity of use, types of materials handled, and any institutional or regulatory requirements. Always consult your laboratory's standard operating procedures and the cabinet manufacturer's recommendations for the most appropriate cleaning schedule for your specific situation.
By adhering to a regular cleaning schedule, you not only ensure the continued effectiveness of your biosafety cabinet but also extend its lifespan and protect the integrity of your research.
What safety precautions should be taken when cleaning a biosafety cabinet?
Safety should be the top priority when cleaning a biosafety cabinet. Proper precautions protect both the person performing the cleaning and the integrity of the cabinet itself.
Always wear appropriate personal protective equipment (PPE) when cleaning a biosafety cabinet. This typically includes gloves, a lab coat, and safety goggles. If there's a risk of splash or aerosol generation, consider wearing a face mask as well.
Before starting the cleaning process, ensure that the cabinet has been running for at least 10-15 minutes to purge any airborne contaminants. If the cabinet has been used for work with hazardous materials, it may need to be decontaminated before cleaning.
Safety is paramount when cleaning biosafety cabinets. Proper PPE use, adherence to decontamination procedures, and careful handling of cleaning agents are essential for protecting personnel and maintaining cabinet integrity.
| Safety Measure | Purpose | Implementation |
|---|---|---|
| Wear PPE | Protect cleaner | Gloves, lab coat, goggles |
| Purge cabinet | Remove airborne contaminants | Run for 10-15 minutes before cleaning |
| Proper chemical handling | Prevent exposure | Follow SDS guidelines |
| Avoid UV exposure | Protect from harmful radiation | Turn off UV light before cleaning |
When using cleaning agents, be aware of their potential hazards. Some disinfectants can be harmful if inhaled or if they come into contact with skin or eyes. Always refer to the Safety Data Sheet (SDS) for each cleaning product and follow the recommended safety precautions.
If your biosafety cabinet is equipped with a UV light, ensure it is turned off before beginning the cleaning process. UV radiation can cause serious eye and skin damage if you're exposed to it directly.
Be cautious when cleaning around electrical components. Avoid saturating switches or control panels with liquid cleaning agents, as this could lead to electrical hazards or damage to the cabinet's systems.
After cleaning, dispose of used materials properly according to your laboratory's waste management protocols. This may involve treating cleaning waste as biohazardous material, depending on the nature of the work conducted in the cabinet.
By following these safety precautions, you protect yourself from potential hazards associated with cleaning chemicals and any residual biological contaminants. These measures also help preserve the functionality of the biosafety cabinet, ensuring it continues to provide a safe working environment for all users.
How can you verify that a biosafety cabinet has been cleaned effectively?
Verifying the effectiveness of your biosafety cabinet cleaning is a crucial step in maintaining laboratory safety and experimental integrity. There are several methods you can employ to ensure your cleaning efforts have been thorough and effective.
Visual inspection is the first and most basic verification method. After cleaning, carefully examine all surfaces of the cabinet under good lighting. Look for any visible residues, streaks, or particles that may have been missed during the cleaning process.
For a more objective assessment, you can use ATP (Adenosine Triphosphate) testing. This method detects the presence of organic matter, which can indicate insufficient cleaning. ATP swabs are easy to use and provide rapid results, allowing for immediate corrective action if needed.
Verification of cleaning effectiveness is essential for maintaining biosafety cabinet integrity. Combining visual inspection with objective testing methods ensures thorough decontamination and helps identify any areas requiring additional attention.
| Verification Method | Advantages | Limitations |
|---|---|---|
| Visual Inspection | Quick, no special equipment | Subjective, may miss microscopic contaminants |
| ATP Testing | Objective, rapid results | Does not specifically detect pathogens |
| Microbial Sampling | Detects viable organisms | Time-consuming, requires lab analysis |
| Fluorescent Markers | Identifies missed areas | Requires special equipment |
For more rigorous verification, especially in high-risk environments, microbial sampling can be employed. This involves taking swabs or contact plates from various surfaces within the cabinet and culturing them to check for microbial growth. While this method provides the most comprehensive assessment of cleaning effectiveness, it is time-consuming and requires laboratory analysis.
Another useful technique is the use of fluorescent markers. Before cleaning, apply an invisible fluorescent powder or gel to various surfaces within the cabinet. After cleaning, use a UV light to check for any remaining fluorescence, which would indicate areas that were missed during the cleaning process.
It's also important to verify the functionality of the cabinet after cleaning. Check that the airflow is correct and that all components, including alarms and indicators, are working properly. Any issues detected during this check should be addressed immediately, potentially involving a certified technician.
Remember that verification is not just about ensuring cleanliness; it's about maintaining the overall integrity and performance of your biosafety cabinet. Regular verification helps identify trends or recurring issues in your cleaning process, allowing for continuous improvement in your maintenance procedures.
By implementing a combination of these verification methods, you can be confident in the effectiveness of your biosafety cabinet cleaning procedures, ensuring a safe and reliable working environment for all laboratory personnel.
In conclusion, maintaining a clean and properly functioning biosafety cabinet is crucial for laboratory safety and research integrity. By following the comprehensive steps outlined in this guide, from understanding the key components to verifying cleaning effectiveness, laboratory personnel can ensure their biosafety cabinets remain in optimal condition.
Regular cleaning, using appropriate agents and techniques, not only extends the life of the equipment but also protects both researchers and experimental materials from potential contamination. The importance of adhering to a consistent cleaning schedule, implementing proper safety precautions, and verifying the effectiveness of cleaning procedures cannot be overstated.
Remember that biosafety cabinet maintenance is an ongoing process that requires diligence and attention to detail. By incorporating these practices into your laboratory routine, you create a safer, more efficient working environment that supports high-quality research and protects the health of all laboratory personnel.
Staying informed about the latest developments in biosafety cabinet technology and cleaning procedures is also essential. As new techniques and products become available, be prepared to adapt your cleaning protocols to ensure the continued effectiveness of your biosafety measures.
Ultimately, the effort invested in proper biosafety cabinet cleaning and maintenance pays dividends in the form of reliable equipment, safer working conditions, and more dependable research outcomes. By prioritizing these procedures, laboratories can uphold the highest standards of safety and scientific integrity.
External Resources
10 Step Guide for Biological Safety Cabinet Decontamination – This guide outlines a 10-step procedure for decontaminating a Biological Safety Cabinet, including steps to purge airborne contaminants, clean and decontaminate surfaces, and use UV lamps safely.
Cleaning and Maintenance of the Biosafety cabinet [BSC] – This resource details daily, weekly, and annual maintenance tasks for Biosafety Cabinets, including surface decontamination, power-up alarm verification, and HEPA filter integrity checks.
How To Clean a Biological Safety Cabinet – A video and guide on cleaning a Biological Safety Cabinet using pre-saturated isopropyl alcohol and deionized water wipes, emphasizing a top-to-bottom cleaning approach and proper disposal of used cleaning materials.
Use and Maintenance of Biological Safety Cabinets – A Standard Operating Procedure (SOP) from the EPA detailing the use and maintenance of Biological Safety Cabinets, including turning off lights and blowers, recording maintenance activities, and annual certification requirements.
Biological Safety Cabinet (BSC) Cleaning: Below the Deck – An enhanced cleaning guide from the NIH that includes steps for cleaning below the workspace deck, using bleach and 70% ethanol, and ensuring proper airflow and disposal of cleaning materials.
Biological Safety Cabinet Decontamination and Maintenance – Although not explicitly listed, this source is often cited and provides comprehensive decontamination steps, including the use of UV lamps and specific disinfectants to protect stainless steel interiors.
- Biosafety Cabinet Cleaning and Disinfection – This guide, linked from the YouTube video, provides detailed steps on cleaning the interior and exterior of a Biosafety Cabinet using validated standard operating procedures and appropriate disinfectants.
Related Contents:
- Biosafety Cabinet Sizes: Finding the Perfect Fit
- ISO 14644 and Biosafety Cabinets: Clean Air Standards
- Biosafety Cabinet Work Surfaces: Materials & Care
- Class I Biosafety Cabinets: Features & Uses
- Recirculating Biosafety Cabinets: Efficiency & Safety
- Class II Type B2 Biosafety Cabinets: Total Exhaust
- Benchtop Biosafety Cabinets: Compact Lab Protection
- Choosing the Right Biosafety Cabinet: 5 Key Factors
- Biosafety Cabinets for Cell Culture: Best Practices


