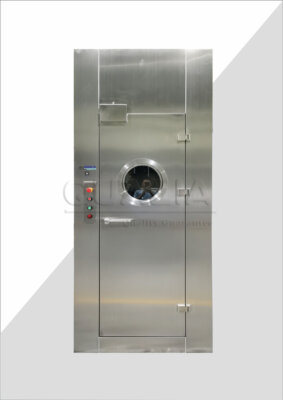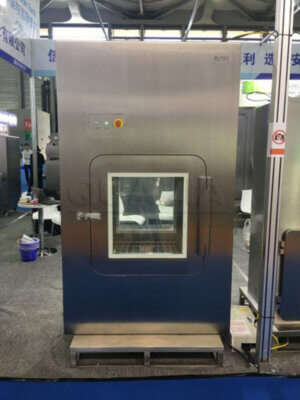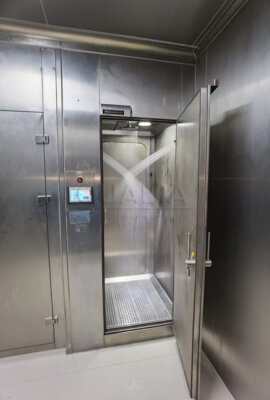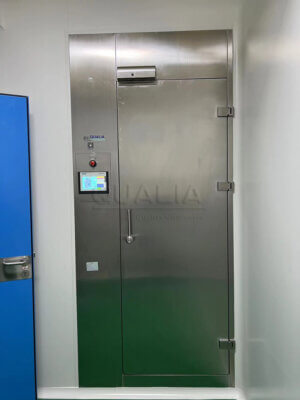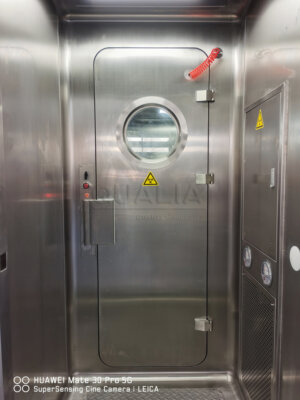


The APR door wall and flush-threshold interface is defined by a single coordinated record: the structural opening dimensions, the wall build-up, the frame position within that build-up, the finished-floor datum, the seal contact line and the trade responsible for each of them, all tied to one drawing revision. Get those six items agreed before the frame is ordered and the rest of the coordination follows; miss the finished-floor datum in particular and the threshold geometry shifts under the door after the opening is already built. An APR door — an airtight, pressure-resistant door — only performs as a boundary when the frame-to-wall joint and the floor beneath the seal are as deliberately specified as the leaf itself.
Record wall, frame and finished-floor datums
Start the interface record with dimensions that describe the finished condition, not the construction condition. A clear opening measured from the structural slab is a different number from the same opening measured to a finished floor that will later receive a coating or a sheet system, and the difference lands exactly where the door seal has to make contact. Write the datum into the record explicitly: slab level, build-up thickness, finished-floor level, and which of those the stated opening height refers to.
The wall build-up deserves the same treatment. The frame has to sit at a defined position within the wall section rather than simply “in the opening,” because its position determines where the perimeter sealing line falls and whether that line is reachable for sealing from one side or both. Record the wall construction layer by layer, the intended frame setting-out, and the sealing contact line the supplier expects to be able to reach and finish.
Lightweight walls and composite cleanroom panels change what the record must show. A panel system carries the finish but is not necessarily the structure that resists door operating loads, so the drawing needs to distinguish the supporting element from the decorative skin, show where the frame anchors into that support, and detail a continuous frame-to-wall seal around the full perimeter. A door leaf that seals well still leaves an incomplete boundary if the frame support or the perimeter joint detail was never drawn and never allocated to anyone. Tying the whole record to a numbered drawing revision keeps later changes visible; the submittal practice described in UFGS 01 33 00, a US government guide specification, is a workable editable model for dimensioned shop drawings, interfaces with other trades, revision identification and the marking of selected product options, though it supplies no APR door dimensions or product-specific content of its own.
Check the flush threshold and actual passage
| Check | Review against | Question to resolve |
|---|---|---|
| Finished surface at the seal contact line | Final floor finish, local level changes and floor slope | Has the supplier identified acceptable conditions for the selected seal? |
| Joints and finish transitions | The joints and transitions where the seal meets the finished floor | Is the mating surface defined across these interfaces? |
| Trolley passage | Usable opening and the largest intended trolley in the finished wall and floor arrangement | Does the actual opening accommodate the intended trolley? |
| Door movement and approach | Door movement envelope and approach space in the finished arrangement | Is there an obstruction along the intended passage? |
A flush threshold answers a passage question, not a sealing question, and the checklist has to treat the two separately. “Flush” describes geometry at floor level: no raised sill to lift a trolley wheel over, no lip to trap cleaning water. The seal, by contrast, needs a defined mating surface — a described finish, with known joints, known local level changes and a known slope — before the supplier can say whether its seal will perform against it. Ask the supplier to state the floor conditions it accepts for the selected seal, rather than specifying an unnamed “cleanable floor finish” and assuming the seal will accommodate it.
Pay particular attention to where finishes change. A transition between a resin coating and a welded sheet floor, a movement joint, or a local fall toward a drain can each cross the seal contact line and create a condition the seal was never dimensioned for. These are the points to describe in the record with their actual positions, not to leave to the flooring contractor’s judgment during application.
The passage check is separate again. Frame position and a flush floor can satisfy the nominal opening dimensions while an adjacent wall return, a pressure gauge, a handwash station or the door’s own swing envelope obstructs the real movement route. Check the usable clear opening, the door movement envelope and the approach space on both sides against the largest trolley, cart or equipment skid actually intended to pass, in the finished wall and floor arrangement rather than the structural one. For a sliding or hinged leaf, the parked position of the leaf itself is part of the obstruction picture.
Coordinate pneumatic supply and control responses
Where the selected APR door uses an inflatable pneumatic seal, the compressed air supply and the control connections belong in the interface schedule alongside the dimensions. A pneumatic seal works by inflating an elastomeric element against the frame or floor contact surface once the leaf is closed, which means the sealed state depends on an external utility being present at a defined pressure and quality. The schedule should record the air connection point and its physical location relative to the frame, the supply conditions the door requires, the control cabling and signal connections, and how seal status is indicated to the operator.
Behavior on loss of air supply is the item most worth settling early, and it is a project decision rather than a drawing detail. What the seal does when pressure is lost, whether the door can still be opened, and what the control system signals are all configuration-dependent, so the supplier states what its equipment can do and the facility’s designated review decides which response the containment and egress strategy requires. Agreeing that behavior before utilities are routed avoids relocating an air line or a control panel after the wall is closed.
The practical reason to put all of this in one schedule is that the door supplier and the facility engineering team otherwise work from different assumptions about the same door. Pneumatic-seal APR doors such as QUALIA’s are supplied with defined utility requirements, and those requirements need to reach the mechanical and controls designers in the same revision as the opening dimensions. Installation sequencing and later seal maintenance access follow from where that air connection sits, so fixing its position at interface stage saves rework at commissioning.
Confirm cleaning and decontamination compatibility
The materials that meet at the threshold are not one material, and compatibility has to be confirmed for each of them against the agents that will actually be used. At a single flush threshold you typically have a floor finish, a joint sealant or welded seam, the frame material, and the door’s seal elastomer — four different chemistries sharing one contact line. Specifying “a cleanable, chemically resistant floor” resolves the floor and leaves the joint and the seal unresolved.
List the real agents and the real contact conditions rather than a generic resistance category. That means naming the detergents and disinfectants in the cleaning regime, the concentrations and contact times they are used at, whether the area is subject to vaporized hydrogen peroxide decontamination, and whether the floor near the threshold is ever flooded or pooled during washdown. Frequency matters too: a surface that tolerates occasional exposure may behave differently under daily application.
Then put that list to the suppliers of each material and ask for compatibility confirmation for the specific combination, including the seal elastomer, because an elastomer that hardens, swells or crazes under a routine agent changes the sealing contact long before anyone inspects it. Where the room is decontaminated with a vaporized agent, confirm compatibility for the condensed-phase contact that occurs at low points and joints, not only for the vapor. If a material’s response to a named agent is unknown, that is a question for the material’s manufacturer rather than something to settle by analogy with a similar-looking product.
Assign installation work and inspection points
Every item at this interface needs a named owner, because the work divides across trades that each finish their own scope and leave the joint between them. Allocate, in writing: who carries out the opening survey and against which drawing revision; who provides the backing or support framing behind a lightweight wall; who seals the frame perimeter joint and with what material; and who applies the final threshold finish up to the seal contact line. An unowned perimeter joint is a realistic way to end up with a correctly installed door in an incomplete boundary.
Sequencing is the second half of the assignment. A rough-opening inspection confirms that the hole is the right size and square; it cannot show the surface the seal will eventually meet, because that surface does not exist yet. Schedule a joint check — door supplier, installer, flooring contractor and the facility’s engineering representative — after the finishes at the threshold and the frame perimeter are actually in place, and record what each party confirmed at that visit.
That second check is also the point to catch work that has been done in the wrong order. Flooring applied up to a temporarily positioned frame, or a frame set before the floor build-up was finalized, usually shows itself as a step or a gap at the contact line. Catching it with the trades present is a repair; catching it at verification is a program problem. ISO 14644-4:2022 frames cleanroom work as a design, construction, start-up and verification process supported by requirements checklists, which is the structure this interface record is serving, though the standard addresses the project framework rather than equipment-specific requirements.
Verify the completed boundary and affected repairs
Verification of the completed interface uses a project-approved check plan that treats the door seal, the frame-to-wall joint and the threshold as three separately identified items. They fail for different reasons and are located by different means, so a single pass or fail on “the doorway” tells the project very little about what to repair. The plan should state, for each of the three, what is being examined, how, and in what configuration the door is held — seal inflated or deflated, door closed and latched, room at its intended pressure relationship — because the result is only interpretable against a recorded configuration.
It is worth distinguishing two questions that often get merged. Locating leakage at a specific interface is a different exercise from assessing whether the assembled boundary meets the facility’s criteria, and the methods differ accordingly. The Canadian Biosafety Standard, Third Edition, applies to Canadian containment facilities according to its containment-level and activity matrix, and it describes inspection of barrier penetrations and smoke checks where inward airflow is required, together with documented verification after changes affecting biocontainment; those smoke checks address directional airflow and are a different exercise from room pressure-decay testing. No universal APR door acceptance value follows from that standard or from any of the others; the method and the acceptance criteria are set by the facility’s own approved test scope, and the decision to accept the boundary or return it to service rests with the designated approver named in that procedure.
Repairs reopen the question. If a frame joint is re-sealed, a threshold section is recut, or a seal is replaced after an initial check, the check plan should say which verification has to be repeated and in what sequence, and the repeat results should close out against the same recorded configuration as the original. Documented verification after changes that affect the containment boundary is exactly the situation the Canadian standard contemplates for facilities within its scope.
Before the verification meeting, have the approved drawing revision with the finished-floor datum, the trade responsibility list, the supplier’s stated acceptable floor conditions for the seal, the agreed pneumatic supply and seal-indication arrangement, the material compatibility confirmations, and the check plan with its three separately identified items. With those in hand, any discrepancy found at the threshold can be traced to a specific drawing, a specific owner and a specific decision rather than argued over on site.
Frequently Asked Questions
Q: Can we reuse an existing opening and floor when replacing an APR door?
A: Base the reuse decision on the actual finished interfaces. Survey the wall build-up, frame support, floor finish and seal contact line, then compare them with the proposed door details. Record any required changes before treating the existing opening as ready for installation.
Q: What should we provide for door coordination if the final floor finish is still undecided?
A: Provide the intended finished-floor datum and proposed finish build-up, with the unresolved choice clearly identified on the coordinated drawing. Once the finish is selected, reconcile its surface and transitions with the seal contact detail. Keep that interface open until the selected combination has been reviewed.
Q: Does a satisfactory door-seal check confirm that the whole installed boundary is complete?
A: No. The result supports only the configuration and interfaces actually checked. Confirm whether the verification record covers the frame-to-wall joint and threshold as well as the door seal, and close any outstanding checks under the project-approved plan. Do not extend a local result to an untested interface.
Q: What if our cleaning or decontamination method changes after the door details are agreed?
A: Recheck compatibility for the exposed floor finish, joint materials and seal together. Document the new agents and contact conditions, then obtain confirmation for that combination. If the review leads to material changes or repairs, identify the affected interfaces and their required follow-up checks in the project verification plan.